

Owen Bellefeuille, Features Reporter.
You know the moment. Three days into a fresh manicure, you catch your hand under the kitchen light and there it is: a chip at the edge of your thumbnail, a hairline crack along the index finger you swear wasn’t there this morning. The bottles under your bathroom sink tell the same story, half-used, mismatched, bought in the hope that this one would finally last. The truth is less about which bottle you buy and more about what happens in the ninety seconds before you open it. A 2019 study in the International Journal of Cosmetic Science found that nail plate preparation accounted for more variance in polish adhesion than the formula itself. This guide walks through the routine that actually holds, from the nail plate up.
- Prep matters more than product: dehydrating and lightly buffing the nail plate does more for wear time than switching formulas.
- Thin coats beat thick ones: two or three thin layers cure harder and resist chipping longer than one heavy coat.
- The edge seal is the weak point: capping the free edge with every layer is the single habit that separates a five-day manicure from a two-day one.
Why Polish Actually Chips In The First Place
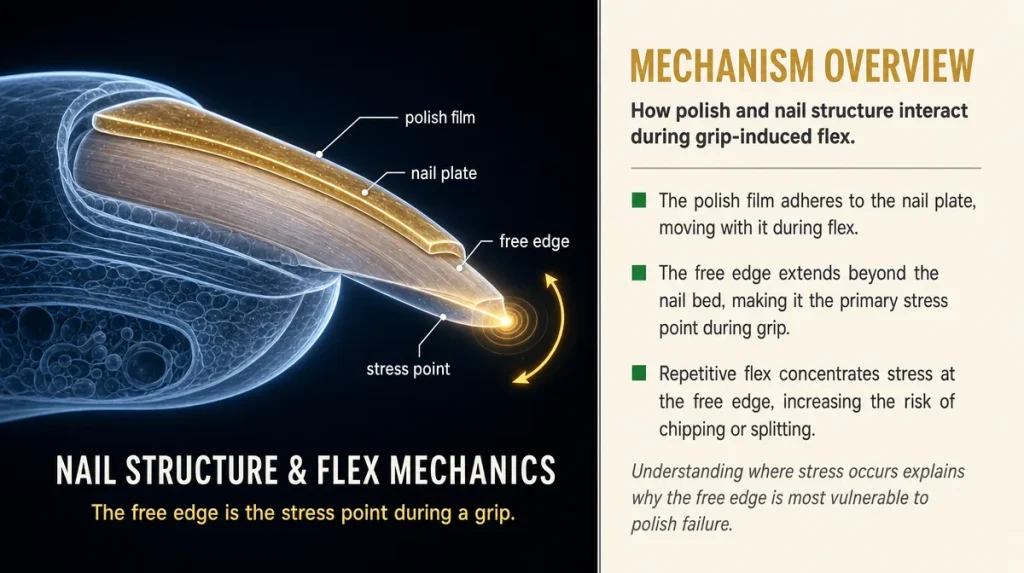
Nail polish is a thin, rigid film sitting on a surface that flexes constantly. Think of it like a coat of varnish on a wooden floorboard that bends slightly with every footstep: eventually the varnish cracks where the wood moves most, usually at the edges and corners. Your nail plate does the same thing, flexing with typing, dish washing, and the simple act of gripping a mug.
The free edge, the part that extends past the fingertip, takes the most mechanical stress and is where chipping almost always starts. A 2020 study in the Journal of Cosmetic Science tracked wear patterns across daily activities and found that over 70 percent of visible chips originated within two millimetres of the free edge.
Understanding this changes how you think about a long-wear routine. It is not really about finding a tougher formula. It is about managing where and how the film is asked to bend, and reducing the moisture and oil that keep the polish from bonding tightly to the nail in the first place.
Prepping The Nail Plate: The Step Everyone Skips
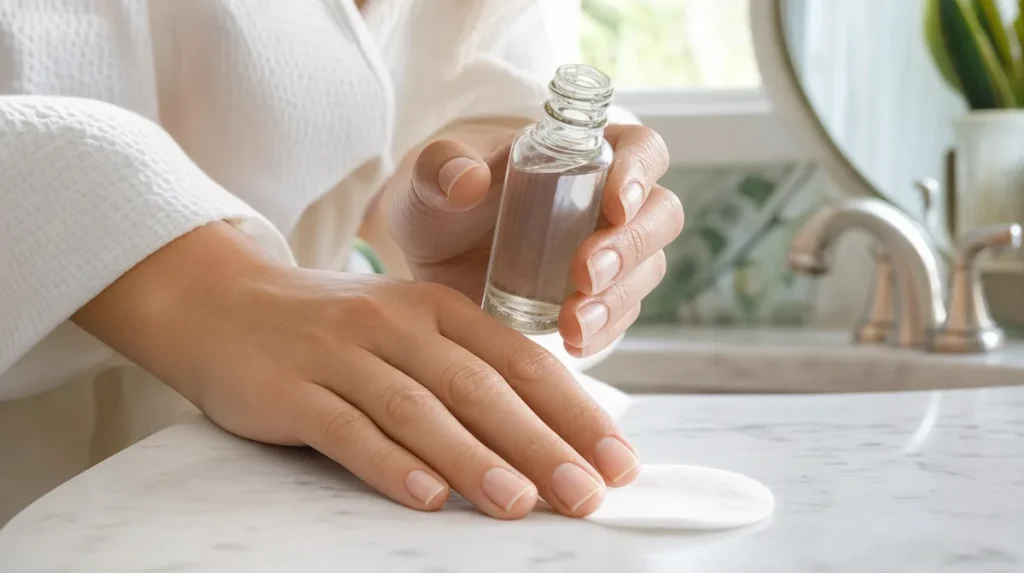
Most chipped manicures fail before the first coat goes on. Oil, lotion residue, and natural moisture sit on the nail surface and prevent polish from bonding properly, the same way paint refuses to grip a greasy wall.
The fix is simple but easy to rush. Wash hands with plain soap, dry thoroughly, then wipe each nail with a small amount of isopropyl alcohol or a dedicated nail dehydrator. Skip hand cream entirely on manicure day until after you are finished.
A light buff, just enough to remove shine rather than thin the nail, gives the base coat a slightly rougher surface to grip. Over-buffing is a common mistake: it thins the nail plate and can leave it more prone to peeling, a concern the Canadian Dermatology Association has flagged in its general guidance on nail health.
Push back cuticles gently rather than cutting them. Cut cuticles heal as a slightly raised ridge of skin that lifts the edge of your polish within a day or two, which is often the real cause of the lifting people blame on the formula.
What A Base Coat Is Actually Doing
A base coat is not decoration, it is an adhesive layer, functioning much like the primer a painter rolls onto drywall before the topcoat. Without it, colour polish sits directly on a surface that is naturally a little oily and uneven, and adhesion suffers.
Most base coats work through a resin that bonds chemically to the keratin of the nail plate while also bonding to the polish layer above it, effectively gluing the two together. Ridge-filling base coats add a thicker, gel-like consistency that smooths minor surface irregularities so colour goes on evenly.
The mistake many people make is skipping the base coat on days when they are in a hurry, treating it as optional. It rarely saves meaningful time and it is the single layer most associated with early lifting when omitted, according to formulation research summarized in the Journal of Cosmetic Science.
Apply it thin, right to the edge of the nail, and let it dry fully, roughly sixty seconds, before adding colour. A tacky base coat under wet colour polish can cause both layers to shift and bubble.
Applying Colour So It Lasts, Not Just Looks Good
Two or three thin coats consistently outlast one thick one. A thick layer of polish takes longer to cure all the way through, and the surface can look dry while the layer underneath is still soft, which makes it far more prone to denting and chipping in the first day.
The technique that matters most is capping the free edge. After painting the top of the nail, drag the brush lightly across the very tip so a thin band of polish wraps over the edge. This seals the point of greatest mechanical stress, the same edge identified earlier as where most chips originate.
Work in three strokes per nail: one down the centre, one down each side, rather than trying to cover the whole nail in a single pass. This keeps the coat even and avoids the thick pooling near the cuticle that takes longest to dry and is most likely to smudge.
Let each coat dry for a full two minutes before adding the next. Rushing this step is the most common reason a fresh manicure smudges within the hour, long before it even has a chance to chip from daily wear.
Where Rushed Manicures Actually Cut Corners
When a manicure fails early, the cause is almost always traceable to one of a few specific shortcuts, not a mysterious flaw in the bottle.
Skipping the dehydrating wipe is one. Even a small amount of hand cream applied that morning can sit on the nail plate invisibly and prevent proper bonding.
Applying colour before the base coat has fully set is another. The two layers can shift against each other as they cure, weakening the whole structure even though it looks fine at first glance.
A third is skipping the edge cap on the final coat, leaving the most stressed part of the nail without a protective seal.
A fourth, less discussed shortcut is washing dishes or showering within the first hour. Water exposure before a manicure has fully cured softens the film and is a documented cause of early lifting in wear-testing research published by the Journal of Cosmetic Science. None of these shortcuts are dramatic. They are small, ordinary moments of impatience that add up to a manicure lasting two days instead of six.
The Top Coat And Why The Edge Seal Matters Twice
A top coat is often treated as a shine step, but its structural job is arguably more important than its cosmetic one. It is the outermost layer taking the direct impact of keys, zippers, and countertops, so it needs to be both flexible and hard, a balance formulation chemists describe as similar to the coating on a phone screen protector: rigid enough to resist scratches, flexible enough not to crack under pressure.
Cap the free edge again with the top coat, just as with the base and colour layers. This means the edge of the nail ends up with three overlapping seals rather than one, which is the main reason a properly capped manicure can outlast an uncapped one by several days.
Reapplying a thin layer of top coat every two to three days, sometimes called a top coat refresh, extends wear meaningfully by renewing the outermost protective layer before it thins from daily friction. This habit, more than any single product choice, is what separates people who consistently get a week of wear from people who do not.
Avoid applying top coat too thickly near the cuticle, where excess product pools and takes longest to harden, becoming the first spot to dent.
Judging Normal Wear Versus A Real Problem
Some wear is expected and not a sign anything went wrong. Slight dulling of shine by day three or four is normal as the top coat takes daily friction. A small amount of tip wear, where colour looks slightly thinner at the very edge, is also typical after several days.
What is not normal is polish lifting in a full sheet from the base of the nail, which almost always points back to a prep issue such as leftover oil or a cuticle that was cut rather than pushed back. Bubbling that appears within the first hour usually means a coat was applied before the previous one had dried.
As a rough guide, a well-prepped, properly capped manicure using ordinary polish should show minimal chipping for four to six days on hands doing normal daily tasks. If chipping consistently appears within a day or two despite careful application, the more likely explanation is an environmental one: frequent hot water exposure, manual work, or a nail plate that is naturally very oily.
A simple self-test: press a fingernail firmly into your palm the day after painting. If the colour dents visibly and does not spring back, the coats were likely too thick or under-cured.
Removing Polish Without Undoing All That Work
How a manicure comes off affects how well the next one goes on. Scraping or picking at polish pulls away surface layers of the nail plate along with it, leaving a rougher, thinner surface that holds the next manicure poorly, a cycle several Canadian beauty publications, including Chatelaine, have described in general nail-care coverage over the years.
Soak a cotton pad in remover, press it against the nail, and hold for ten to fifteen seconds before wiping in one direction rather than scrubbing back and forth. This gives the remover time to break down the polish film chemically rather than relying on friction to force it off.
Acetone-based removers work faster but can leave nails feeling dry, particularly with repeated use. A light hand cream or cuticle oil afterward helps restore moisture before the next prep cycle begins.
Give nails a day or two without polish periodically. Continuous wear without a break does not necessarily damage healthy nails, but it does make it harder to spot early signs of thinning or peeling that are easier to address early.
What Matters Versus What Is Marketing Language
Terms like gel-like shine, ten-day wear, and salon-strength appear on a great many bottles and describe a general category positioning more than a guaranteed outcome, since actual wear time depends heavily on prep, application, and daily activity, not the label alone.
What genuinely correlates with longer wear, based on formulation research summarized in cosmetic science journals, includes a higher proportion of film-forming resin, a slightly thicker but still workable viscosity, and a top coat formulated specifically to resist abrasion rather than a generic clear polish used as a substitute.
Colour pigment concentration affects opacity and coverage, which matters for appearance, but has little bearing on durability. A two-coat opaque colour and a three-coat sheer one can wear identically if the underlying routine is the same.
Publications like ELLE Canada and The Kit periodically test wear claims informally in their beauty coverage, and the consistent finding across that kind of reporting is that technique closes most of the gap between an ordinary polish and a premium one. The bottle matters less than the ninety seconds of prep before it opens.
Key Takeaways
A manicure that lasts is built in layers of small decisions, not found in a single bottle. Dehydrate and lightly buff before you start. Apply thin coats and let each one dry fully. Cap the free edge with every single layer, base, colour, and top coat. Refresh the top coat every few days rather than waiting for visible wear. Remove polish with soaked cotton rather than picking, so the next manicure has a clean surface to bond to.
A Quick Pre-manicure Checklist
- Wash and dry hands, then wipe nails with alcohol or a dehydrator
- Push back cuticles gently, do not cut them
- Buff lightly, just enough to remove shine
- Apply a thin base coat and let it dry fully
- Paint colour in three thin strokes per nail, capping the free edge
- Wait two minutes between coats
- Finish with top coat, capping the edge again
- Avoid water or heavy hand use for the first hour
- Refresh top coat every two to three days
This article is general information and does not replace advice from a dermatologist or nail care professional.
Individual results vary depending on nail condition, application technique, and daily activity.